This is an alternative masking method for cups you are going to engrave in the rotary.
Anyone can do this! No special tools, equipment or special purchases needed.
You probably have everything you need sitting around you now. It is fast and easy.
The coating is even and very smooth. Clean up is a breeze!! You will have to give it a try.
Supplies:
Latex House Paint Your choice of Interior or Exterior. I will test them both soon.
I use black interior paint, but not saying any type or color is any better than others until more testing is done. I don't see why one would be any different other than clean up. Coverage may be different also. Will be worth testing further.
Bowl / Cup / Cylinder
Choose something close in diameter to your glasses. The closer the better because less paint will be required. It needs to be taller than the level of the masking you want to apply.
Drying Rack
Cover your table good and use anything for a drying rack. I used high dollar stuff,, pencils.
Blow Dryer (Optional)
You can use the blow dryer to level the paint if needed. It is not necessary, but will speed up the drying time. Test pieces were dry to the touch within 30 minutes without any help.
Mixing the Paint: There is no real method or science to it. Each paint will require a different mixture.
The basic mixture and place to start would be,
2 parts paint to 1 part water.
If it is too thick, it will be blothchy and have waves of paint sliding down. Add more water.
If it runs off too fast, it is to thin. You may want to poor some off then add more paint.
Smooth and Even Coating
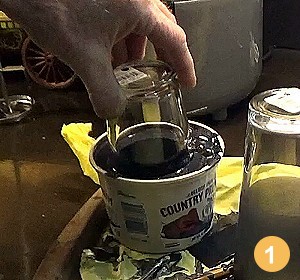
Application / Dipping: (Pic-1) Hold your cup straight up and lower it into the dip container. An air pocket will keep paint from getting inside your cup. Lower the cup into the solution to get the desired level of coverage on your cup to be engraved. Paint will rise in the container so be careful it doesn't run over. It will rise to the top, but you can keep lowering the cup without anything spilling over. You will want to practice at that one.
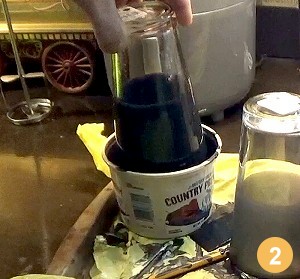
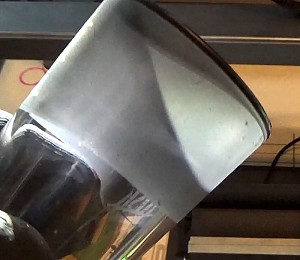
(Pic-2) Slowly lift your cup straight up out of the masking solution.
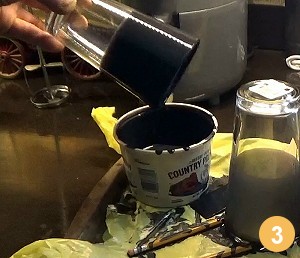
(Pic-3) Hold the cup at a slight angle and Rotate the cup a couple of turns allowing the excess to drip off. The coating will even out and dry a little before being placed on your drying rack.
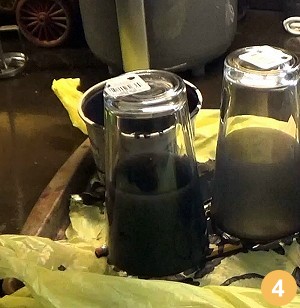
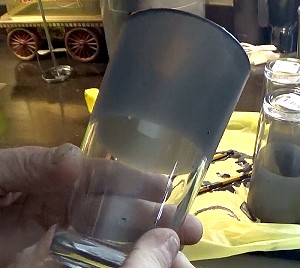
(Pic-4) Place your cup on your drying rack. It should be dry to the touch in about a 1/2 hour.
You can apply a second coat, if desired, after about 10 minutes drying time.
In about a half an hour your cups will be ready for engraving
Use the same laser settings you were using before and you should be fine.
It may take less power to cut the latex depending on the thickness of the coating you applied,
so you may be able to lower the heat or raise your speed.
Clean Up:
There is nothing to it! Let soak for just a minute and the masking falls right off. I have been rubbing my engravings with a small piece of Scotchbrite pad to remove any loose or embedded glass chips.
I hope you enjoyed this page and it does help you!
Would love to hear your feedback!